Now this tutorial isn't just for those of you heading to a blog conference, it's for anyone who likes a cute bag. I think this would be perfect for toting towels to the pool, transporting dance gear to class, or to use as a purse. You all are crafty bunch--I bet you can think of a million ways how you would use this Personalized Chevron Tote Bag!
I found my inspiration for the project from Nest of Posies. She makes adorable embroidered totes with flowers. Some of my favorite crafty bloggers have been seen carrying them out and about. It's a fun way to promote your brand. Or if you are making one for personal use, add you name, favorite word, inspirational quote, or funny phrase!
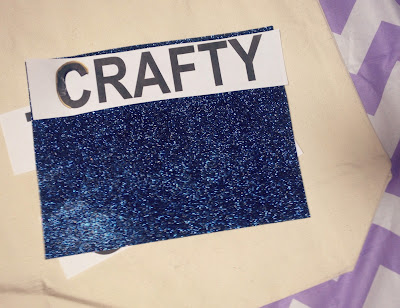
I jazzed the tote up by sewing the grey chevron to the pockets on the back as well as a square on the front. (Hint: I 'hot glued' the fabric in place and then sewed. That way, the fabric stayed in place for me.) I left the edges unfinished, but stitched closely to the side of the fabric so the 'fray' would be somewhat controlled. Then I used Word to create the lettering for my blog name. I don't have a fancy cutting machine. So I just printed out the Word document and used it as a template to cut out the letters. Finally, I ironed them on. You can see more detailed instructions about using sparkle transfer sheets here.
I was really pleased with how it turned out. I got lots of nice compliments on it and I think it helped to promote my blog in a fun way.
 |
| Maisy took this pic of me-- nice photography for a 3 year old don't ya think?! |

Like this post?
Subscribe to crafty texas girls
Like pretty things?
Check out my shop, "Samantha Conner Designs"-fabulous accessories for the girl who has everything.
Sharing my bag at :
-The Scoop -Too Much Time on My Hands -Home Stories A to Z -Tatertots and Jello
-The 36th Avenue -Whipperberry -Serenity Now -Love of Family and Home -It's Overflowing
-Inspire Me
All photos and text on craftytexasgirls.com are copyright protected. You may not copy entire articles or posts (even with a link) without my express written permission. Email any requests or links used to craftytexasgirls@gmail.com.


Love the bag!!! Great tutorial and Maisy is a budding photographer!
ReplyDeleteI saw you and your bag at Blissdom! I should have said hi, but we were across the room. Loved the bag!
ReplyDeleteI didn't even notice the pockets when I saw this! Super cute idea! ;)
ReplyDeleteI didn't even notice the pockets when I saw this! Super cute idea! ;)
ReplyDeleteThanks friends. It was fun to make! :) Samantha
ReplyDeleteHi Samatha, what darling bags you have made. I'm your neighbor to the right on the blog party list. Please visit me at 366.
ReplyDeleteThanks,
Helen of Helen's Decor
Very cute! Might have to (somewhat) copy you!
ReplyDelete